EXAMPLES
Example 1:
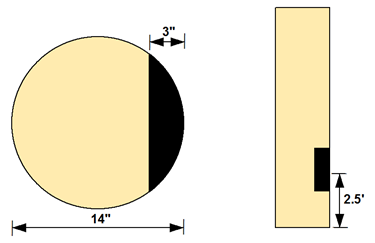
A 45’, class 3, southern pine distribution pole has been hit by a passing vehicle resulting in a 3.0” deep gouge 2½’ above the ground. The pole measures 14” in diameter directly above the damaged area.
To Assess the Damage Proceed as Follows:
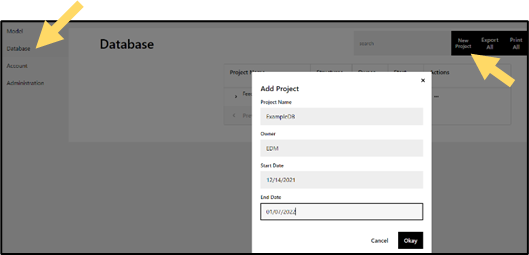
- Click the Database menu, and then select New Project to create a D-Calc project. The Add Project dialog appears. Enter a Project Name - ExampleDB. Optionally enter a project owner name, a project start date, and a project end date. Click the Okay button to save the project in the database.
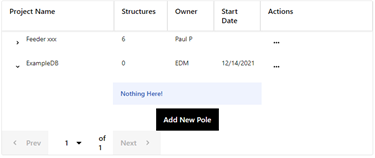
- Click the > button to select that Project as the Current Project. Then select Add New Pole. The Project Name will transfer into the Pole Info section of D-Calc and a Structure Name for the pole will be generated by the system, unless overriden by the user.
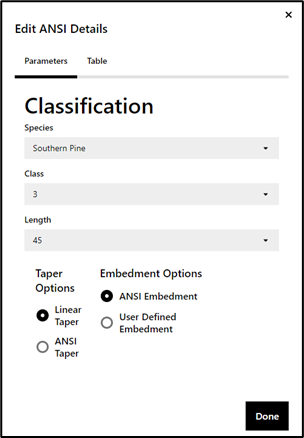
- Click the Edit ANSI Details button to enter the ANSI specifications for the pole. Select Species (Southern Pine), Class (3), and Length (45). Also select Linear Taper and ANSI Embedment. Then click Done to return to the main screen.
- On the main screen, enter the actual dimensions of the pole and the location of the damage. Since you measured the diameter, click into the Diameter text box, and input 14 (units are inches). Then, enter 2.5 as Distance From Groundline (ft) to show that the damage is 2½’ above the ground.
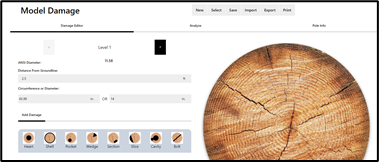
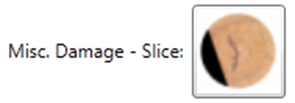
- Click on the icon for Misc. Damage – Slice in order to enter a damage description.
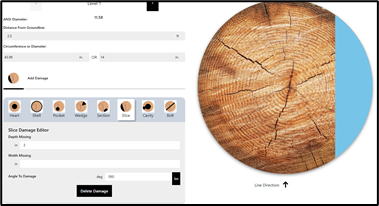
- The damage can then be described in the text boxes which appear below the damage icons as follows: 3 for the Depth Missing (in) dimension, and 90 for Angle to Damage (deg.). (You can repeat this step with different values to see how the damage can be increased or decreased and moved around the pole). As you update the parameters, the pole graphic (to the right on large screens and below on small screens) will update.
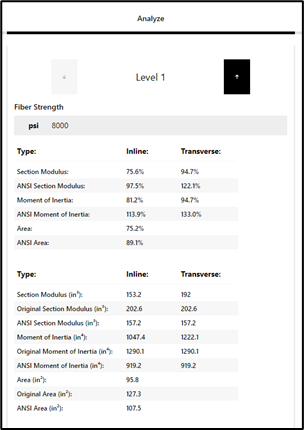
- Now, click the Analyze tab (top-center of the screen). The results indicate that the pole has 91% remaining section modulus in-line and 68% remaining transverse, based upon the actual pole size. The ANSI COMPARISON results show that the pole was oversized to begin with and retains 161% of its in-line section modulus and 120% transverse. This pole, which would be rejected by most evaluations, has a larger section modulus than required by ANSI minimums for an undamaged pole of the same class.
Example 2:
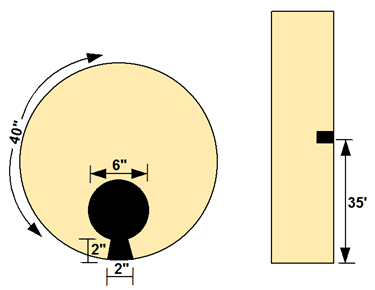
A 70’, class 1, Douglas-fir transmission pole has a woodpecker nest 35’ up the pole. The nest is 6” in diameter, has a 2” entry hole and a 2” outside shell remaining. The entry hole opens in the line direction. A tape measure was used to measure the circumference directly above the nest at 40”.
To Assess the Damage Proceed as Follows:
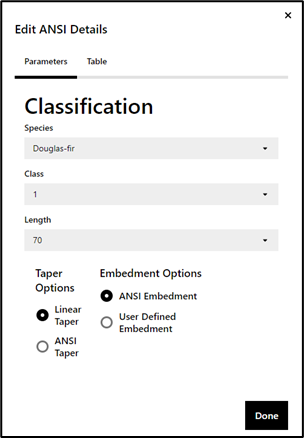
- Click the New button to start a new pole, then click the Edit ANSI Details button to enter the ANSI specifications for the pole. The ANSI Classification dialog appears. Enter Species (Douglas-fir), Class (1), and Length (70). Set the taper to Linear Taper and the embedment to ANSI Embedment. Click Done to return to the main screen.
- On the main screen, enter the actual dimensions of the pole and the location of the damage. Since you measured the circumference, enter 40 into the Circumference text box. Then, enter 35 as Distance From Groundline (ft) to show that the damage is 35’ above the ground.
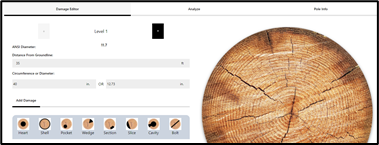
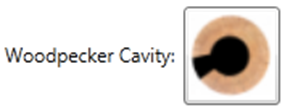
- Click on the icon for Woodpecker Cavity in order to enter a damage description
- Enter 2 for Circumference Missing (in), 2 for Shell Thickness at Opening (in), 6 for Nest Diameter (in), and 180 for Angle to Opening (deg)

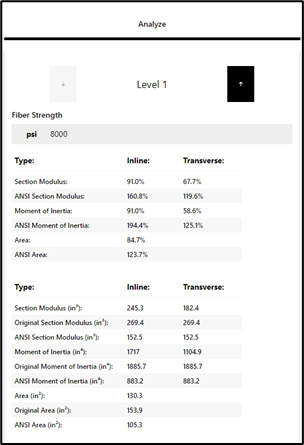
- Click the Analyze tab. The results indicate that the pole has 76% remaining section modulus in-line and 95% remaining transverse, based upon the actual pole size. The ANSI COMPARISON results show that the pole was oversized to begin with and retains 98% of its in-line section modulus and 122% transverse.